Create a blog with Webiny and Svelte / SvelteKit

As a Senior Frontend Engineer with years of professional experience building web applications, with a focus on frontend development. I enjoy critically analyzing software requirements and effectively prioritize them. I'm a good observer of software engineering best practices and work well in a team. I have a strong interest in clean, testable, and maintainable code.
In this tutorial, we will use SvelteKit as a static website generator with Webiny Headless CMS. Why are we choosing these 2 tools? SvelteKit’s forwardRef system can be considered an improvement on the virtual DOM, and Webiny is easier to manage and more cost-effective than other Headless CMS tools on the market.
For the purpose of this tutorial, it's best to have a basic knowledge of Svelte/SvelteKit, Javascript, and GraphQL.
Goals
This article aims to instruct the user on how to connect to Webiny Headless CMS and use it as a data source for a Frontend built with Svelte and SvelteKit.
We will cover:
A brief introduction to Svelte and Webiny
Installing a new SvelteKit site
Setting up and deploying a Webiny project
Authenticating with Webiny Headless CMS GraphQL API
Fetching data for pages using Webiny Headless CMS
Creating pages from API data
Using the Preview API to fetch draft data
Conclusion
Resources
Prerequisites
To follow along with this tutorial, do ensure that you have done the following:
Set up an AWS account and user credentials locally
Ensure that you have Node.js version v16.14 on your machine.
Ensure that you have yarn ^1.22.0 || >=2 installed - Webiny works with both yarn versions.
Any IDE. I recommend VS Code
Star our GitHub Repo 😉
What Is Svelte/SvelteKit
Svelte is a modern JavaScript compiler that takes your code as input and uses it to generate optimized JavaScript code. It is a web framework created by Rich Harris. Svelte works by transforming declarative code into required code that works with native browser APIs. Compiling the code you get into better-performing code in a much smaller package.
SvelteKit is the fastest way to create Svelte applications, is used for building web applications of all sizes, and has the ability for server-side rendering routing and code splitting.
What Is Webiny
Webiny is an open-source CMS, but unlike its competitors, Webiny has the option to self-host applications running on its own AWS cloud with its advanced features such as a plugin ecosystem, security, and infrastructure as code. It allows large teams to build and iterate quickly at scale.
Installing a New SvelteKit Site
Let's begin by setting up our SvelteKit project to create our blog. To install SvelteKit, run the command: This command does the heavy lifting of setting up the project folder.
npm create svelte@latest  webiny-blog
-
cd webiny-blog
The name of the application is webiny-blog. Use graphql-request to send API requests to your headless CMS. Let's install this:
yarn add graphql-request graphql
 #or
npm install graphql-request graphql
-
npm install
-
npm run dev -- --open
Once installed, we can begin writing our code.
Setting up and deploying a Webiny project
Let's set up and deploy a new Webiny project. Model your content in a headless CMS with a generated admin app. To deploy the Webiny project, run the following command. This command does the heavy lifting of setting up the project folder.
npx create-webiny-project svelte-blog
The name of the application is svelte-blog. When you run the command we are asked to select a database that is between Dynamo DB and DynamoDB + Elasticsearch. We are choosing the first option because the use case of the project we are creating does not require a large database like Dynamo DB + Elasticsearch.
The command will install the project locally. But, to be able to use the service, you need to deploy the project with the command below into your AWS account.
cd svelte-blog && yarn webiny deploy
If you have not setup your AWS account credentials ,check here.
The project will consist of his three applications: a Headless CMS GraphQL API, a management app, and a public website.
If you didn't notice your credentials information after deploying successfully, you can always get it by running this command below:
yarn webiny info
You will see results like this in the terminal.
Environment: dev
-------------------------
➜ Main GraphQL API: https://YOUR_API_KEYS.cloudfront.net/graphql
➜ Headless CMS GraphQL API:
   - Manage API: https://YOUR_API_KEYS.cloudfront.net/cms/manage/{LOCALE_CODE}
   - Read API: https://YOUR_API_KEYS.cloudfront.net/cms/read/{LOCALE_CODE}
   - Preview API: https://YOUR_API_KEYS.cloudfront.net/cms/preview/{LOCALE_CODE}
➜ Admin app: https://YOUR_API_KEYS.cloudfront.net
➜ Public website:
   - Website URL: https://YOUR_API_KEYS.cloudfront.net
   - Website preview URL: https://YOUR_API_KEYS.cloudfront.net
-------------------------
After the deployment is complete, click the admin app URL and you will be redirected to the admin dashboard as shown below:
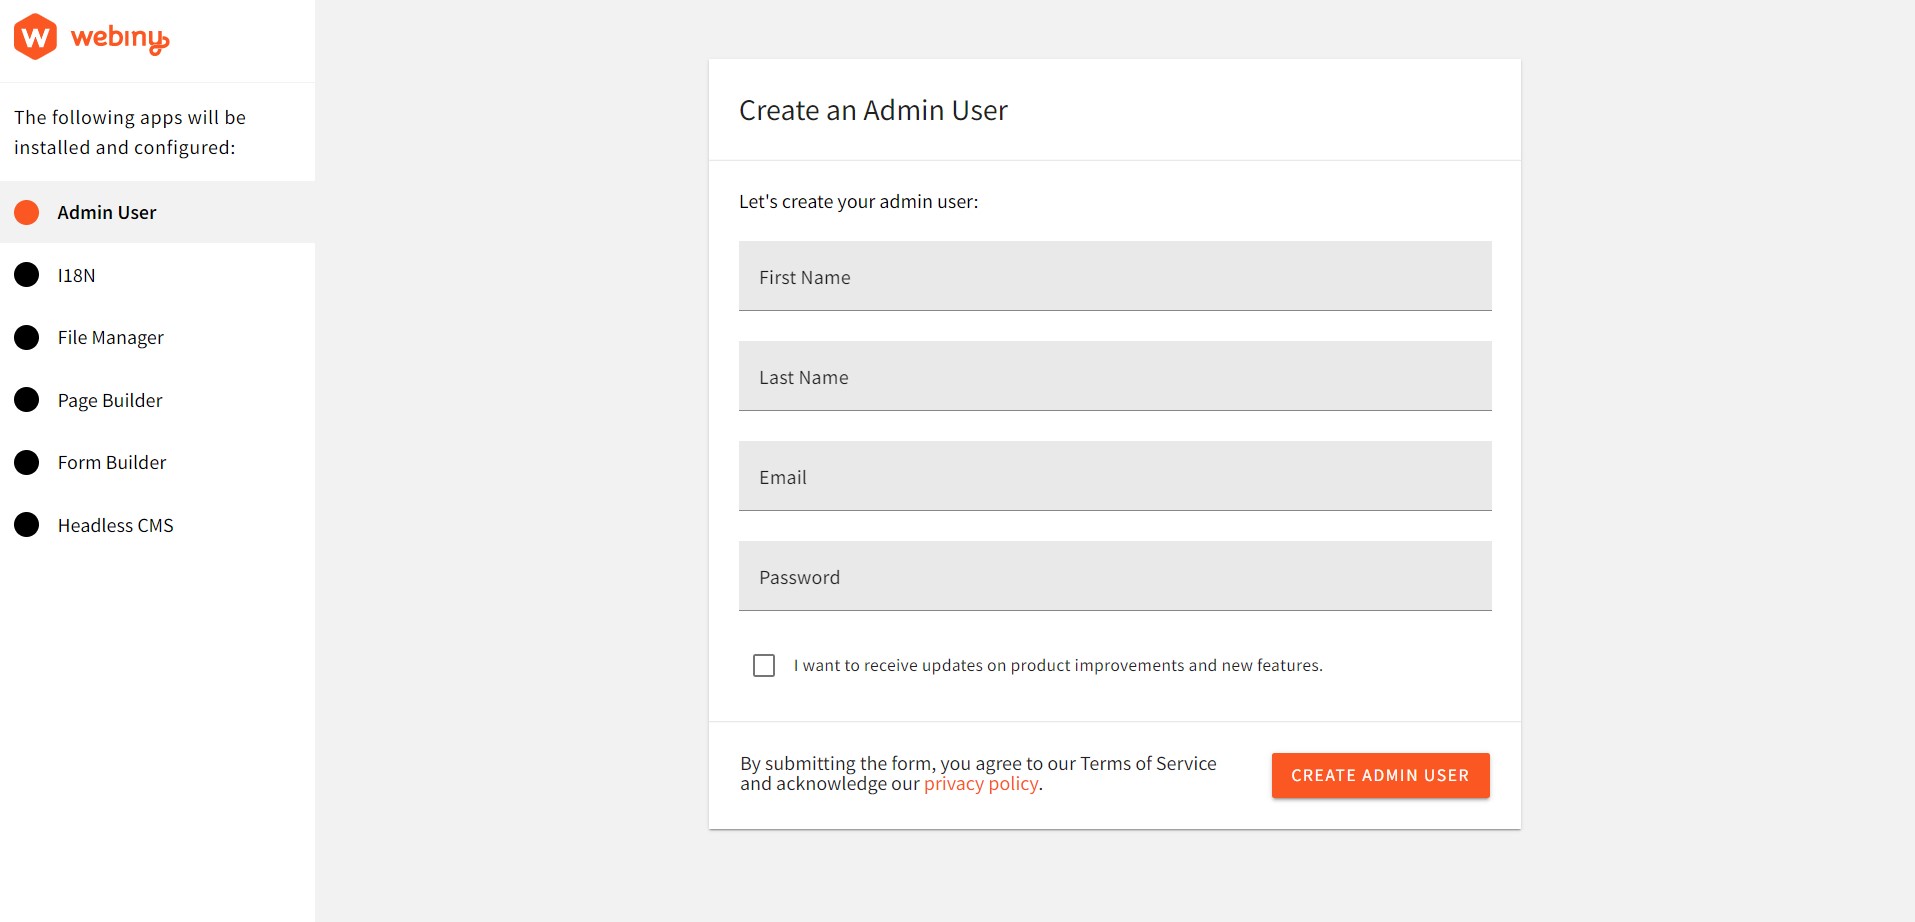
For the first time accessing the Admin app we would be prompted to create a default user with our details. After doing that, we will be taken to the welcome page:
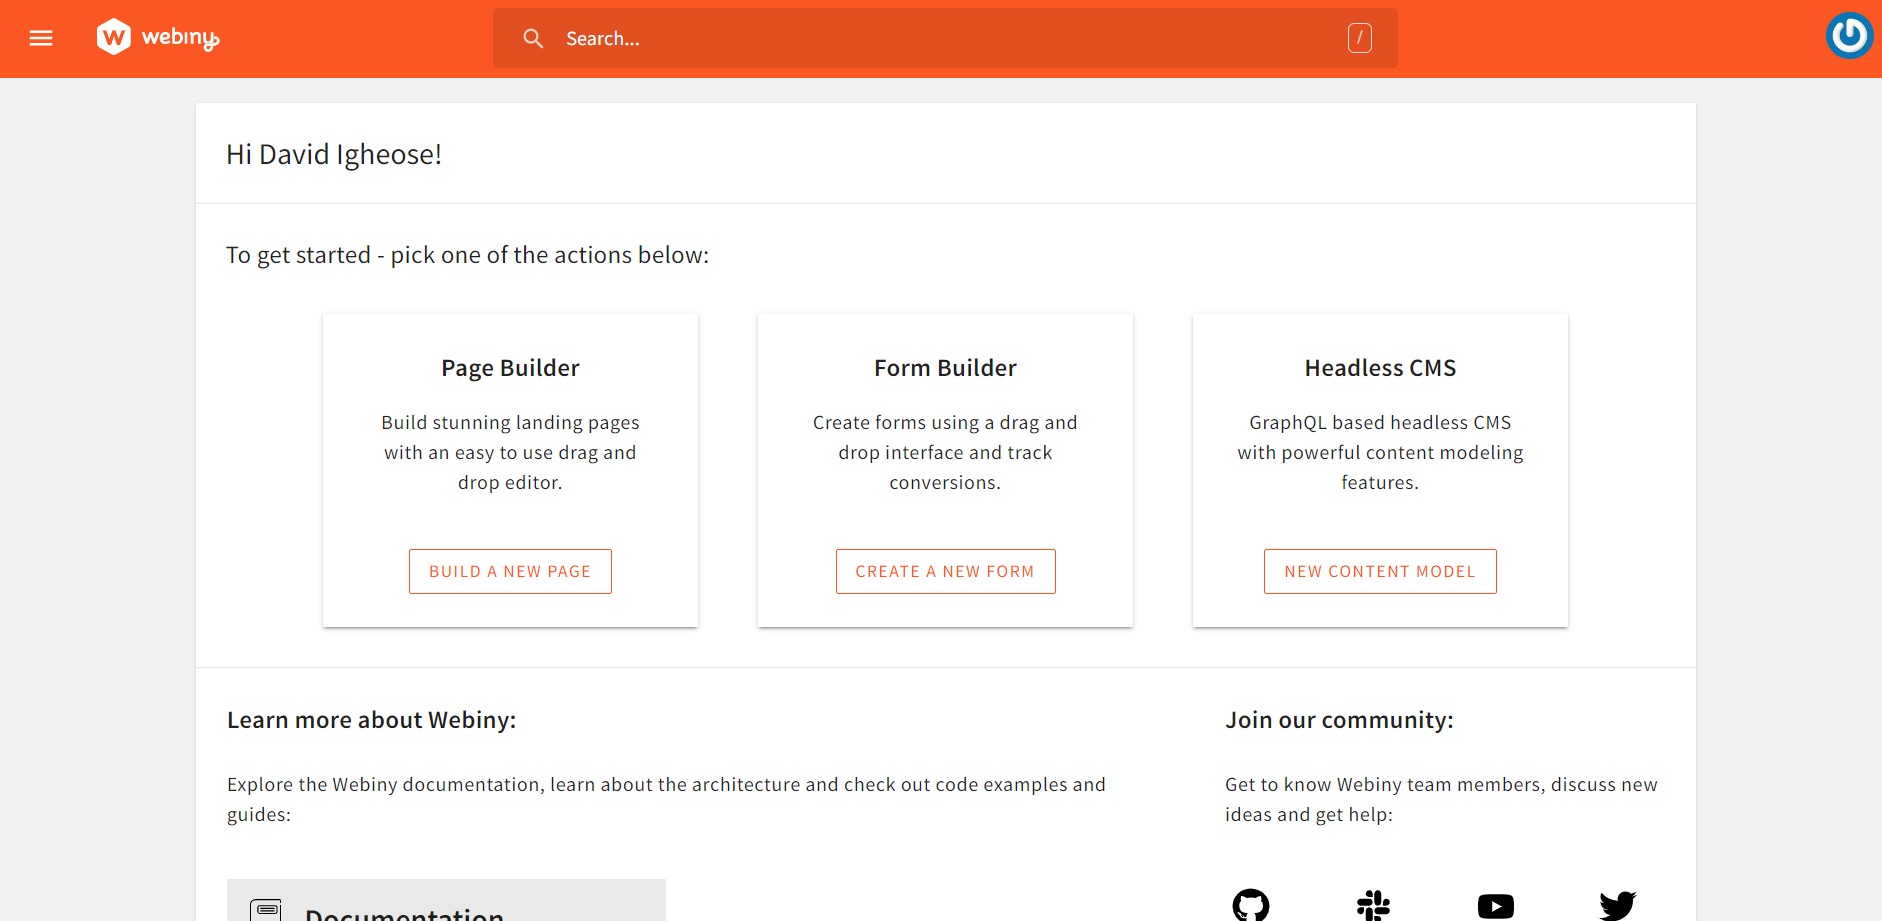
Then click the **New Content Model button ** inside the headless CMS card to go to the Content Model page, and on the next page click New Modal at the top of the page. A prompt appears with a form for adding information for the new content model.
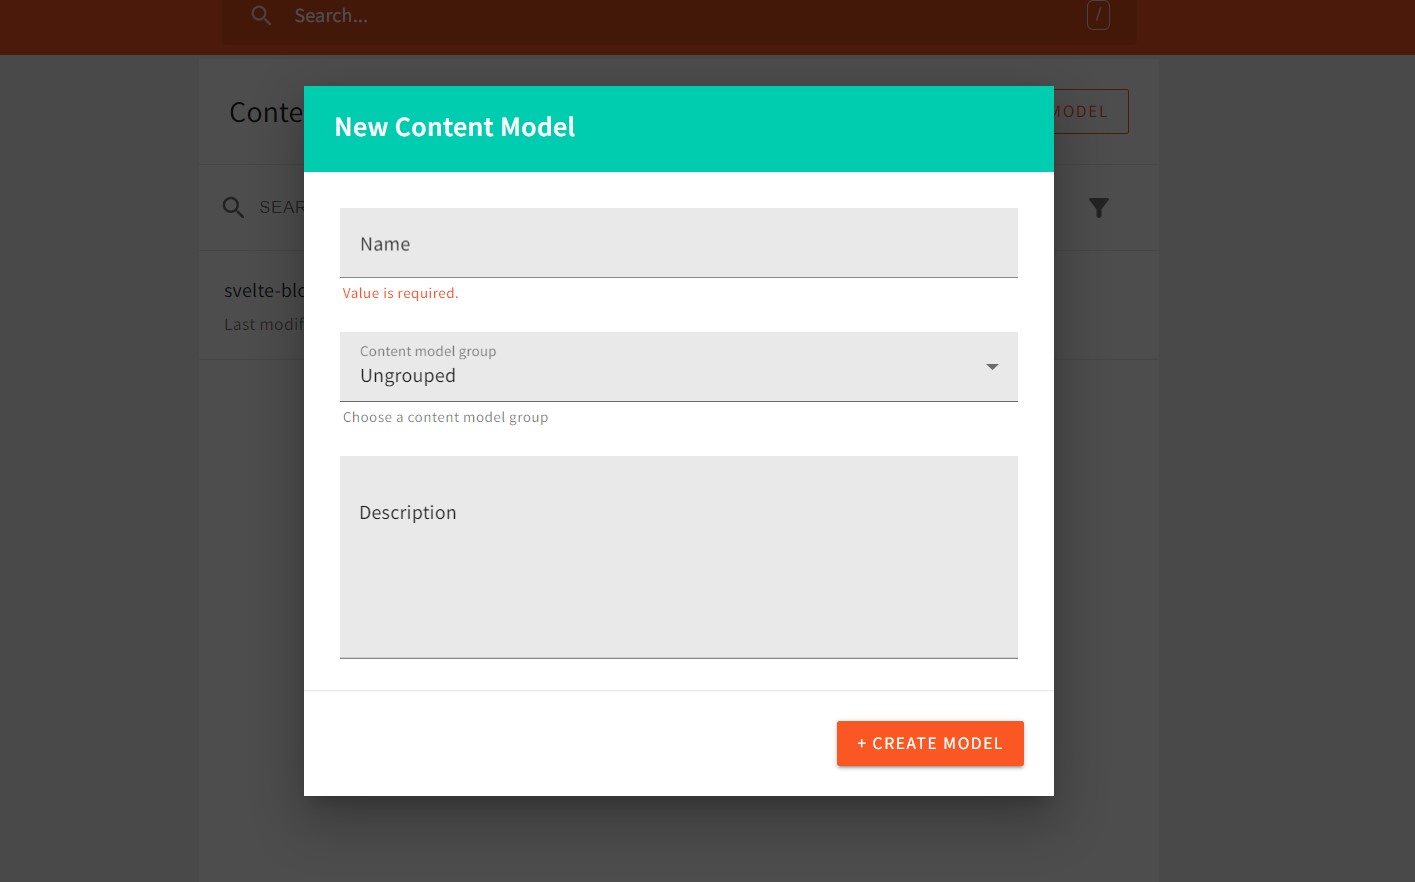
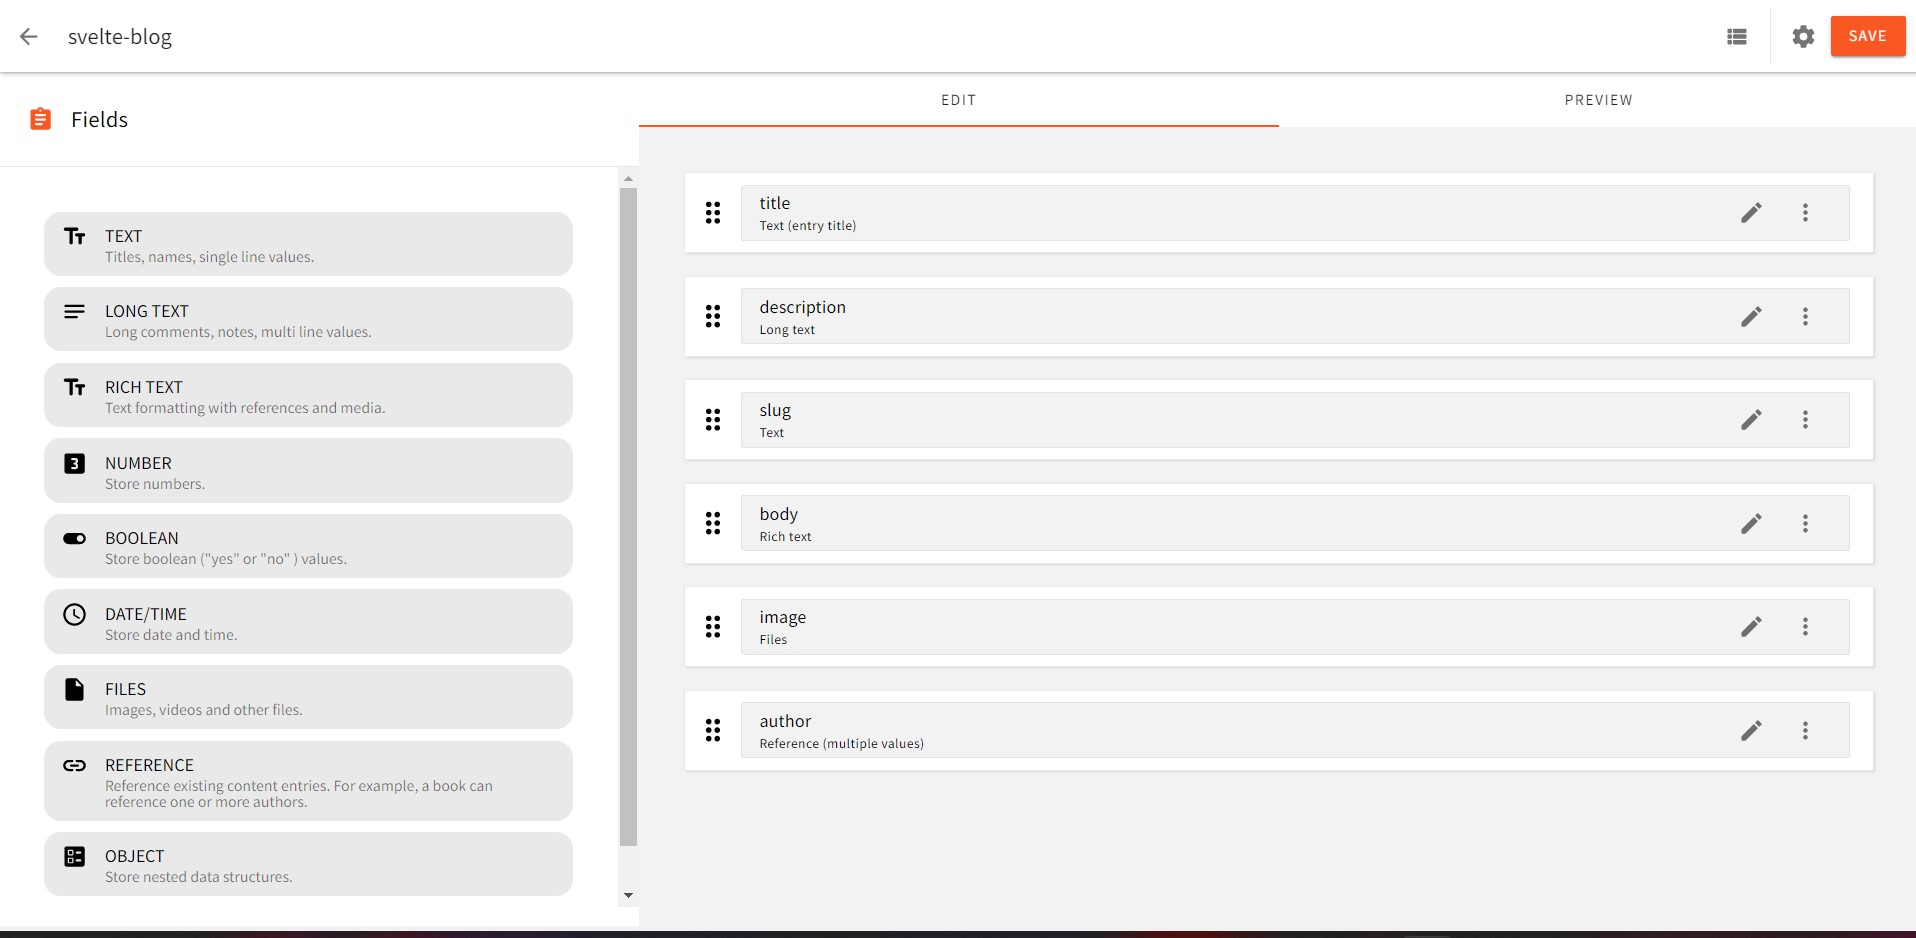
Enter ** svelte-blog** at the name prompt and click the Create Model button. On the next page you can see the different field types you can add to your svelte-blog model.
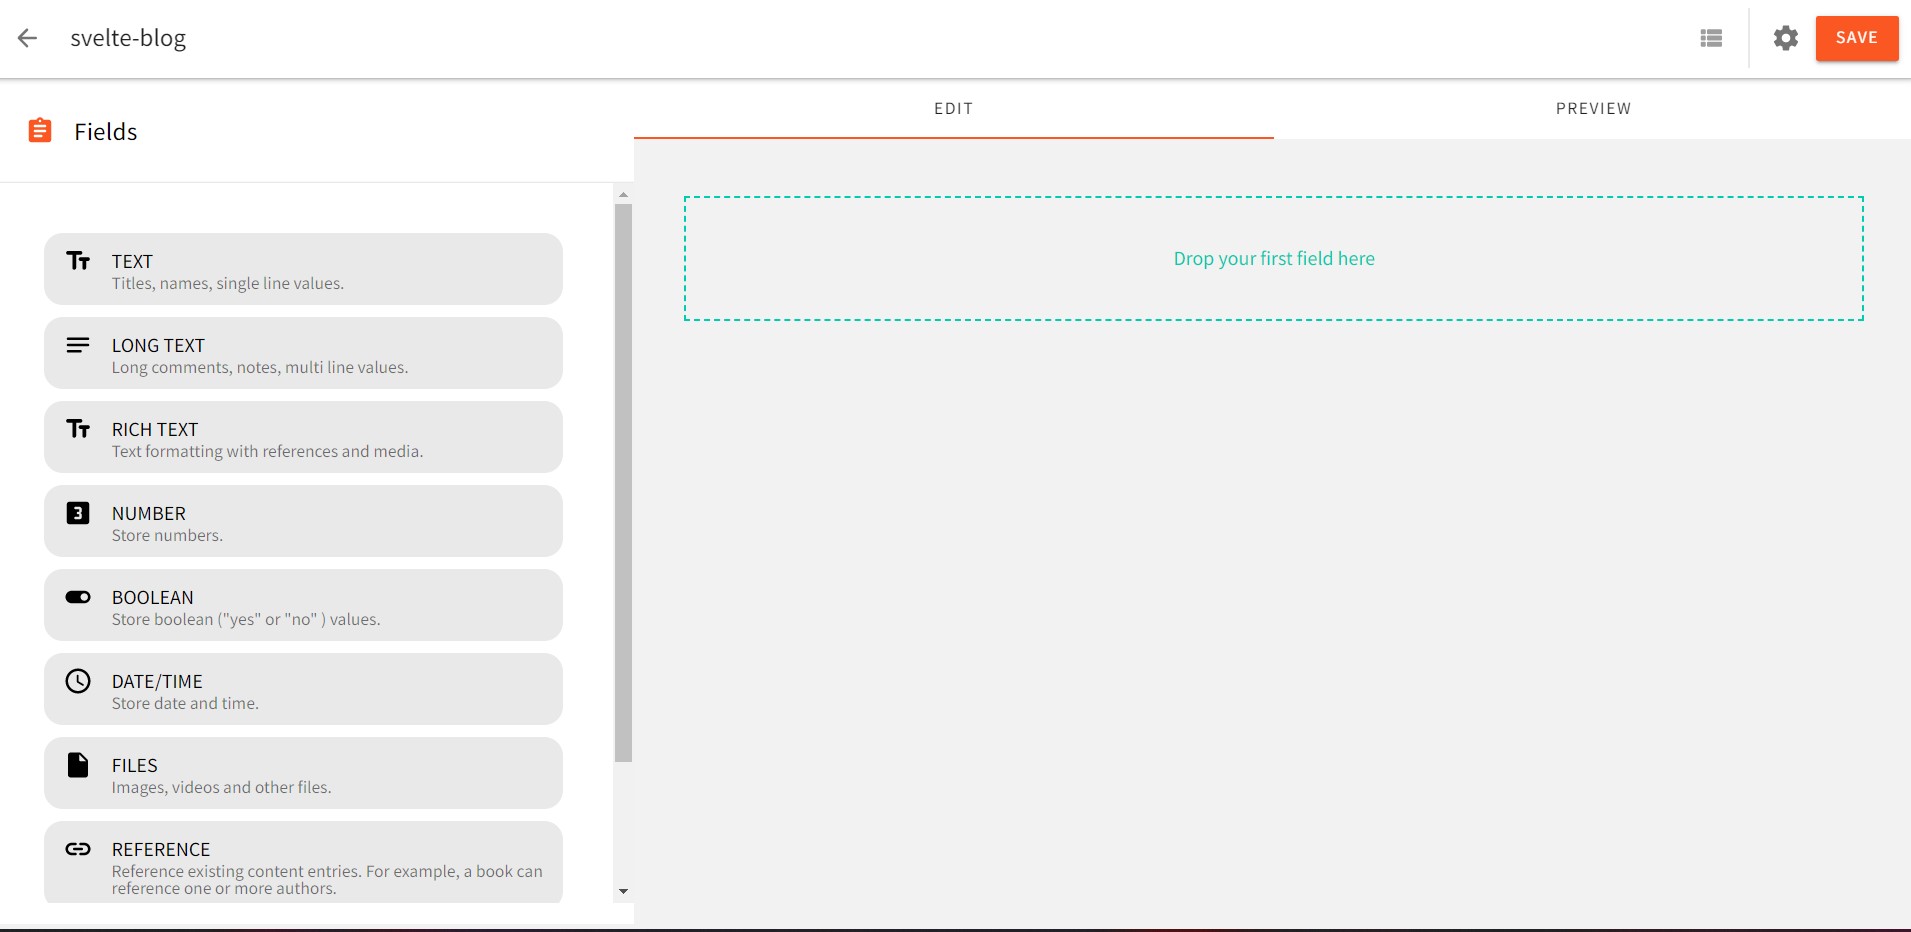
This is what the post content model looks like:
Now that you've added the fields that define the content structure of your **svelte-blog **model, you can start adding content. To add content to your model, click the **View Content icon ** next to the Setting icon at the top of the page.
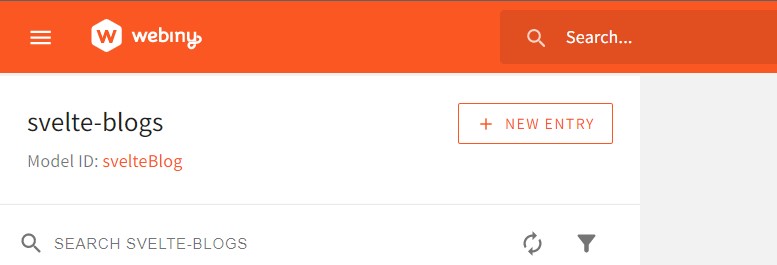
Then click the NEW ENTRY button and at the prompt that appears enter the values for the above object properties in the appropriate prompts as follows:
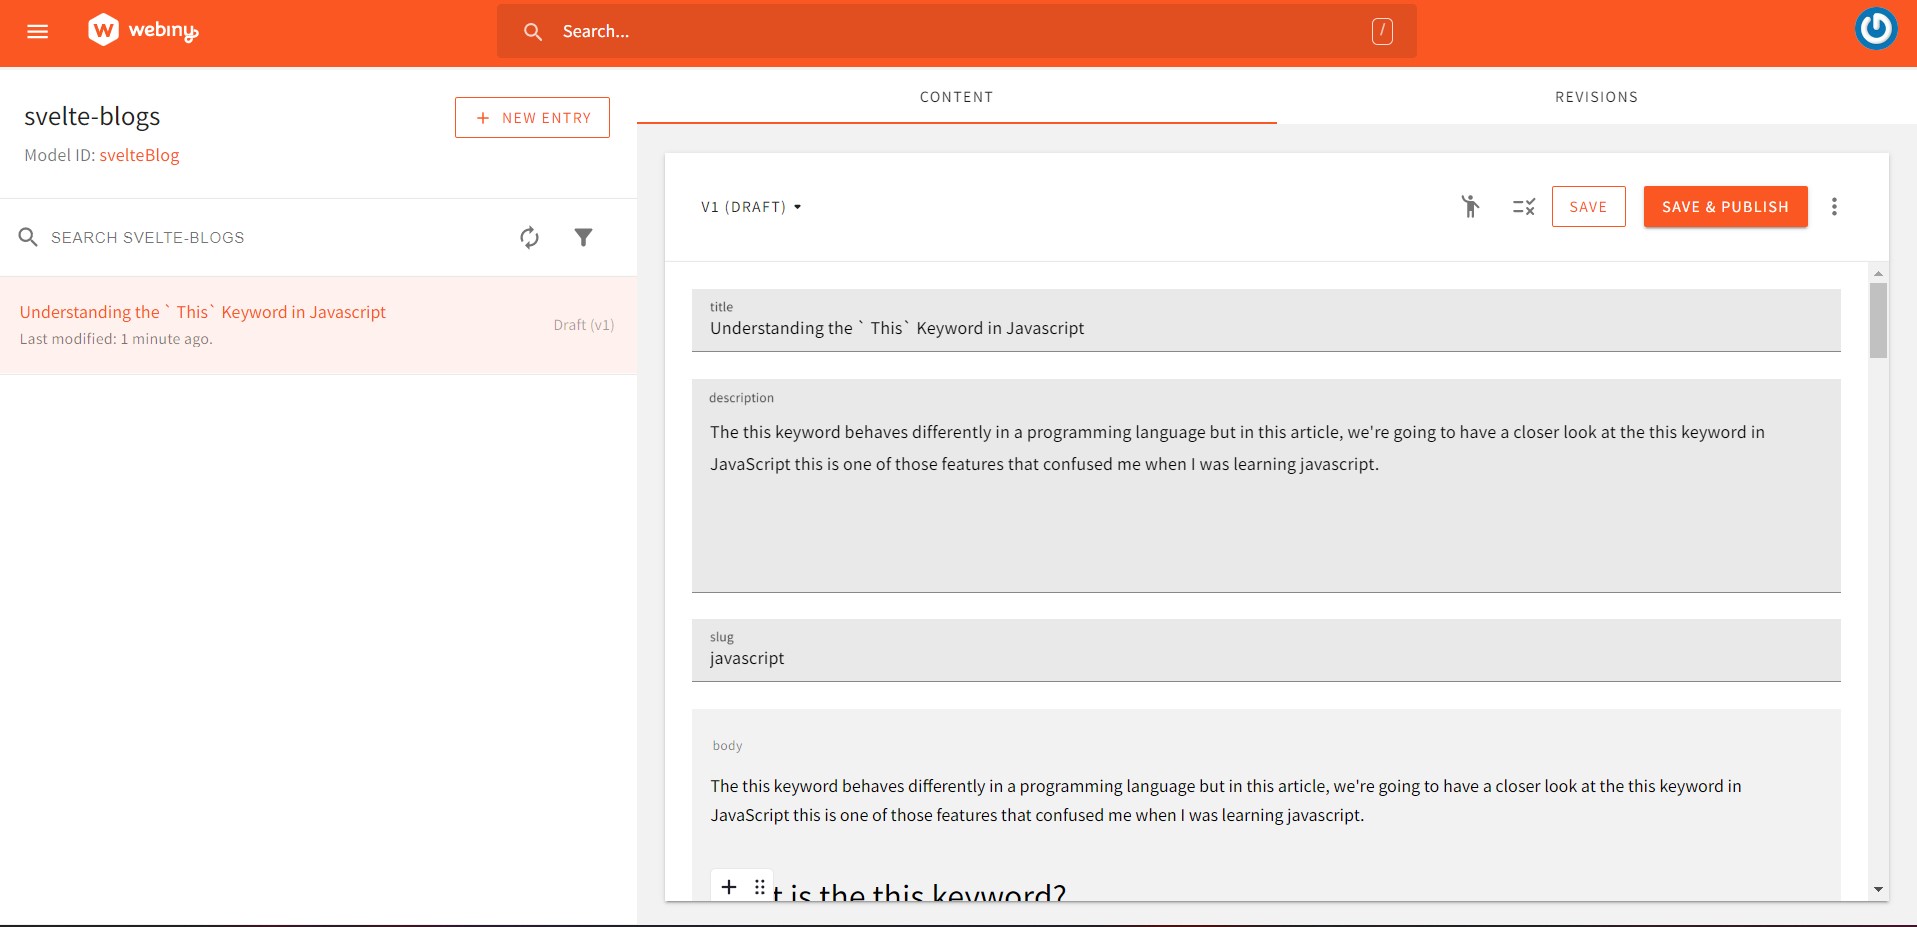
Then click SAVE & PUBLISH at the top right of the page and click CONFIRM in the popup that appears. You have now added your first piece of content to your svelte-blog model.
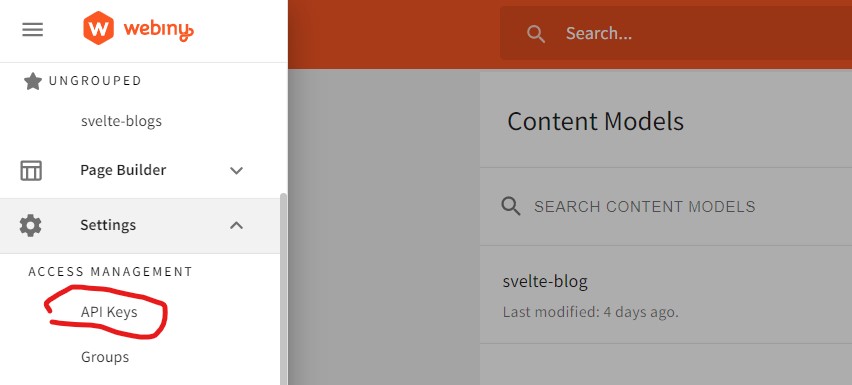
To get an API token, go to your Admin app and expand the Settings tab in the sidebar. You will see your API key in the Access Management section.
Authenticating with Webiny Headless CMS GraphQL API
Before you can access your headless CMS from Sveltekit, you need a token and an API URL. How to get the URL:
Create a new API key and give your headless CMS all the permissions it needs to read content.
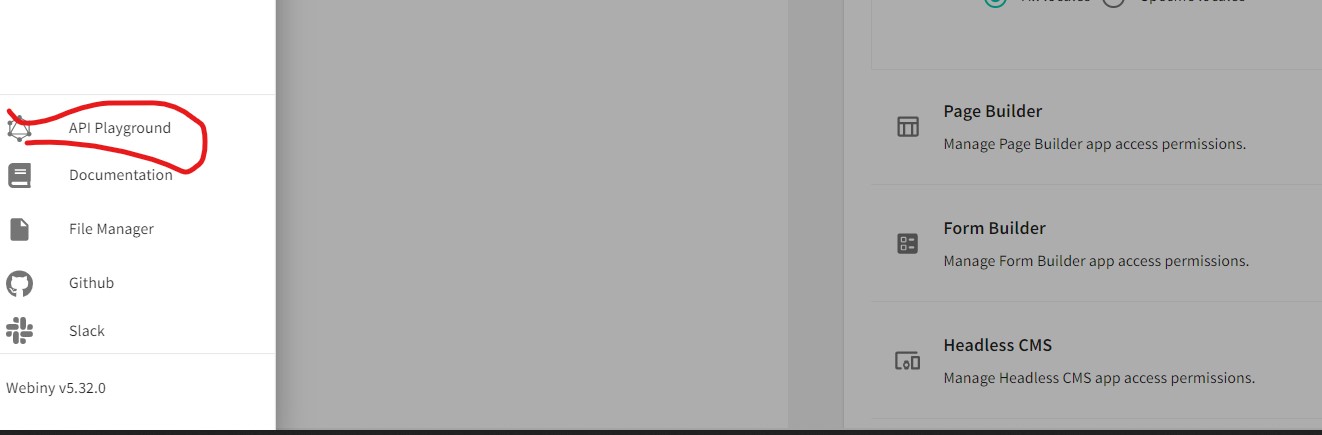
Select API Keys from the Settings menu:
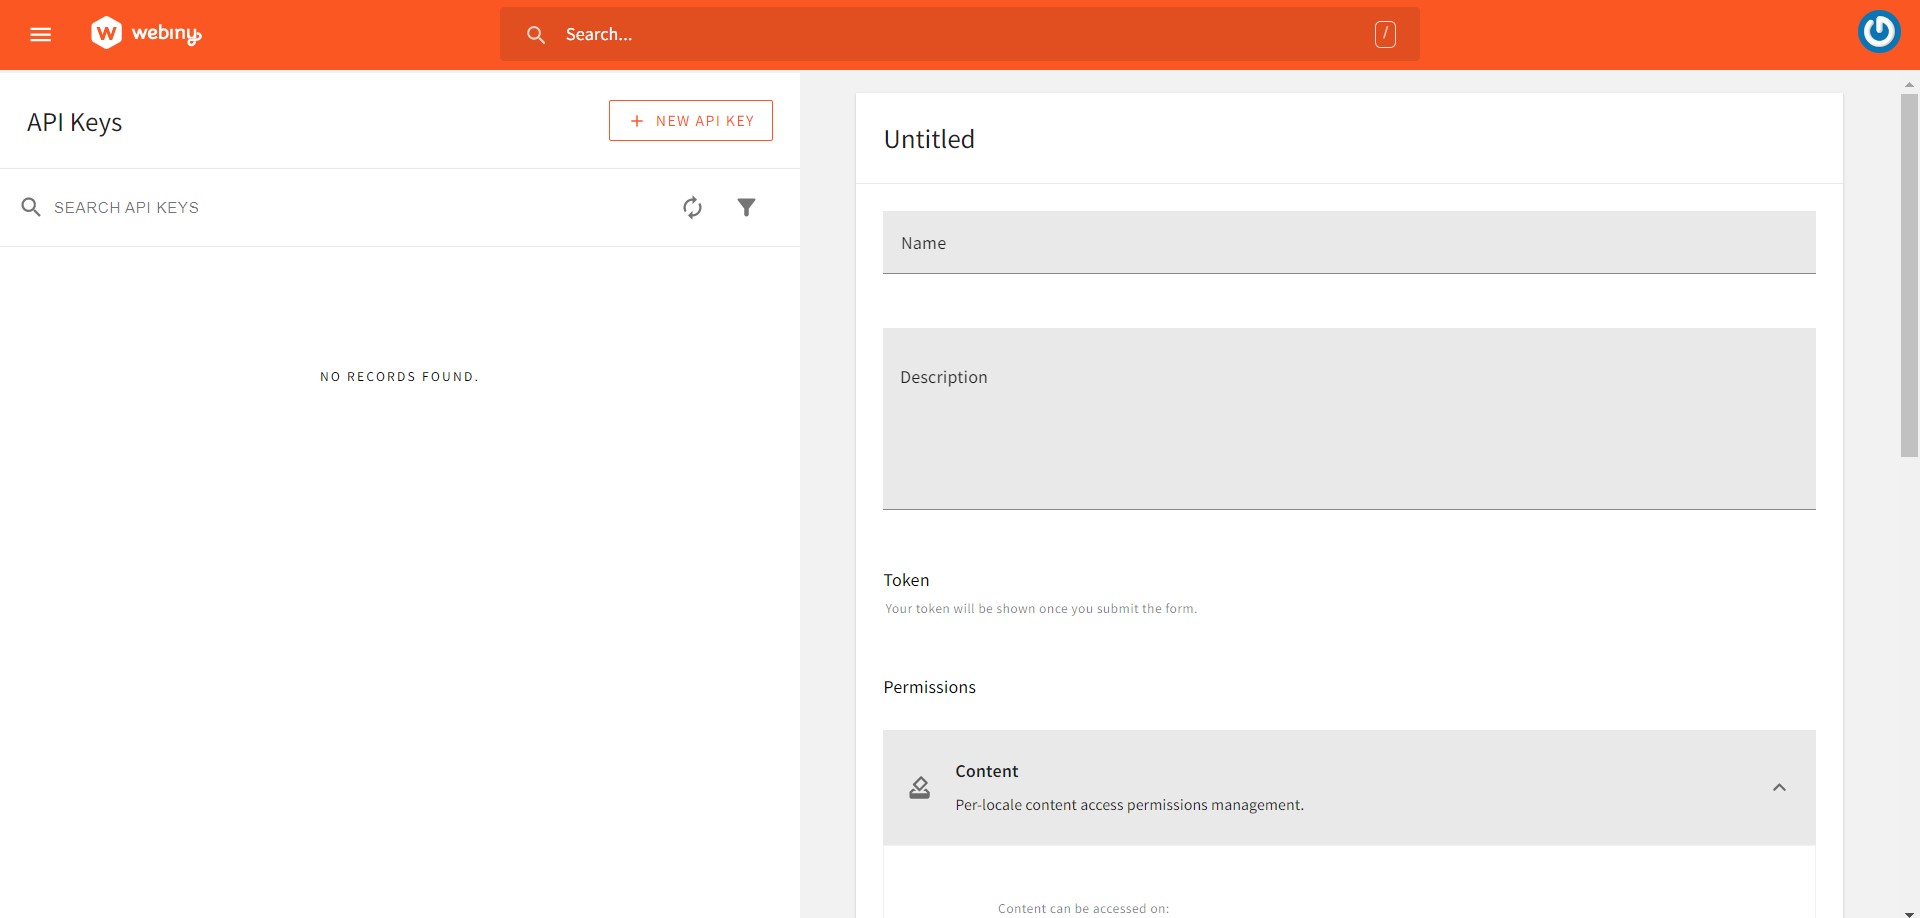
Enter a name and description, scroll down the page, expand the Content tab, and select All Locales.

Then expand the Headless CMS tab. This tab contains options that control what API tokens can and cannot do.
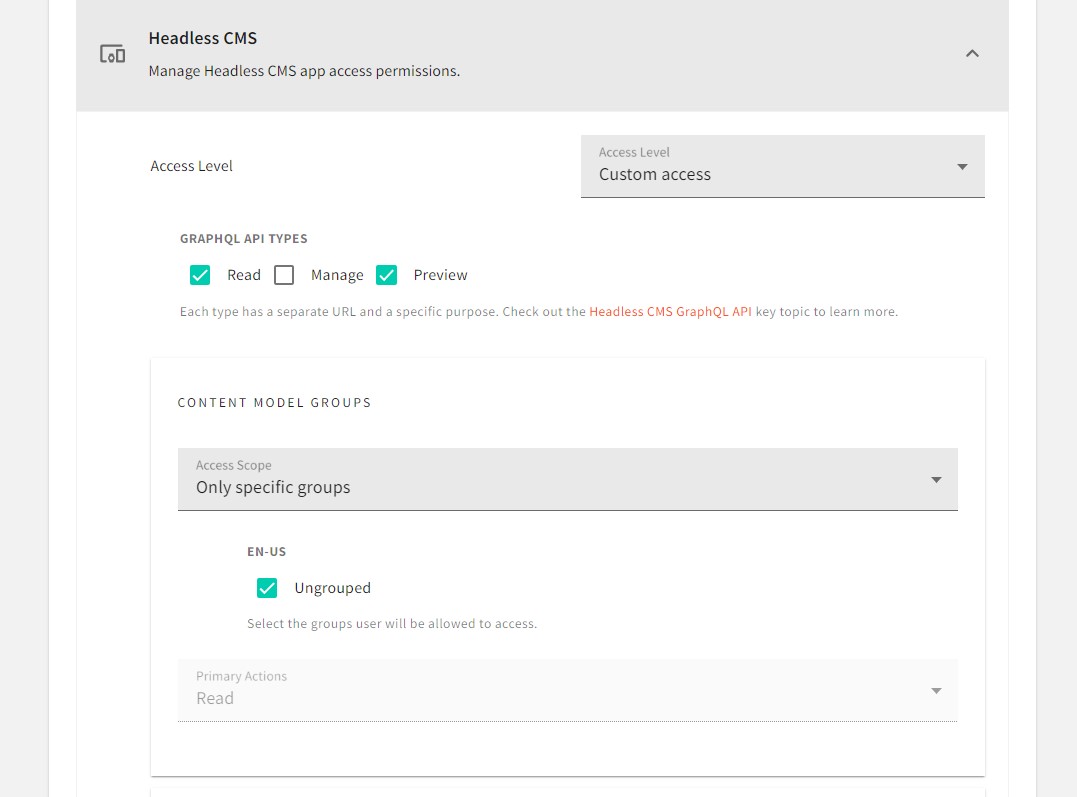
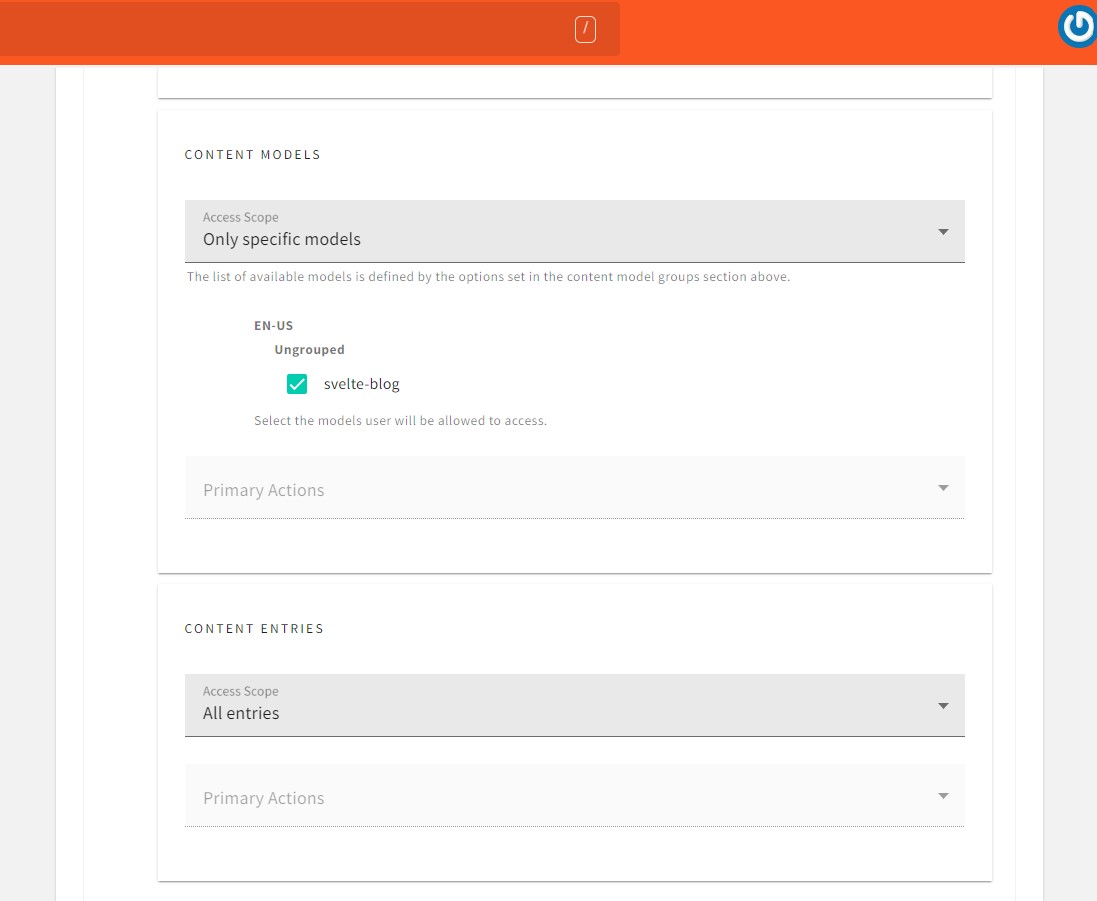
After setting the controls, click the SAVE API KEY button at the bottom of the page to create an API token.
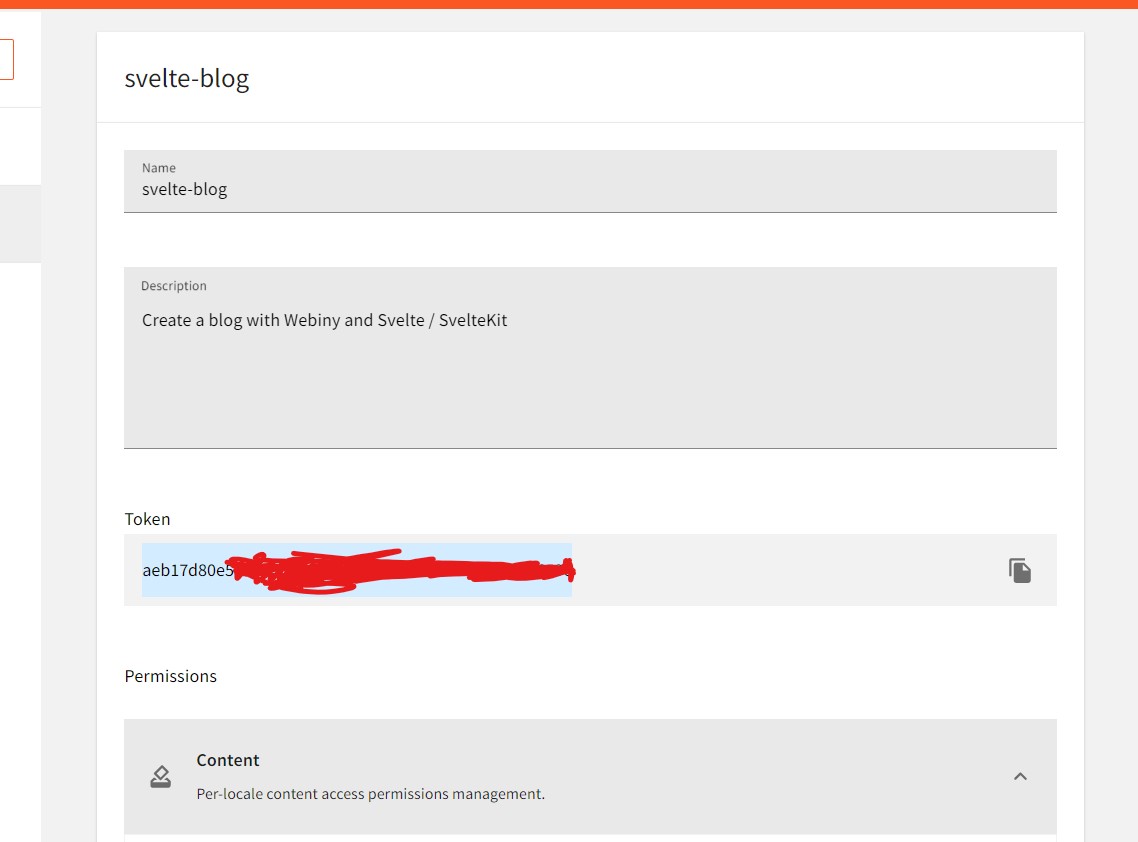
Now you can copy the token and save it in your Svelte app's ** .env file**.
Then, to get the URL, go to API Playground in the Admin app, click the Headless CMS – Read API tab at the top of the page, and copy and paste the URL just below the tab. Is included.
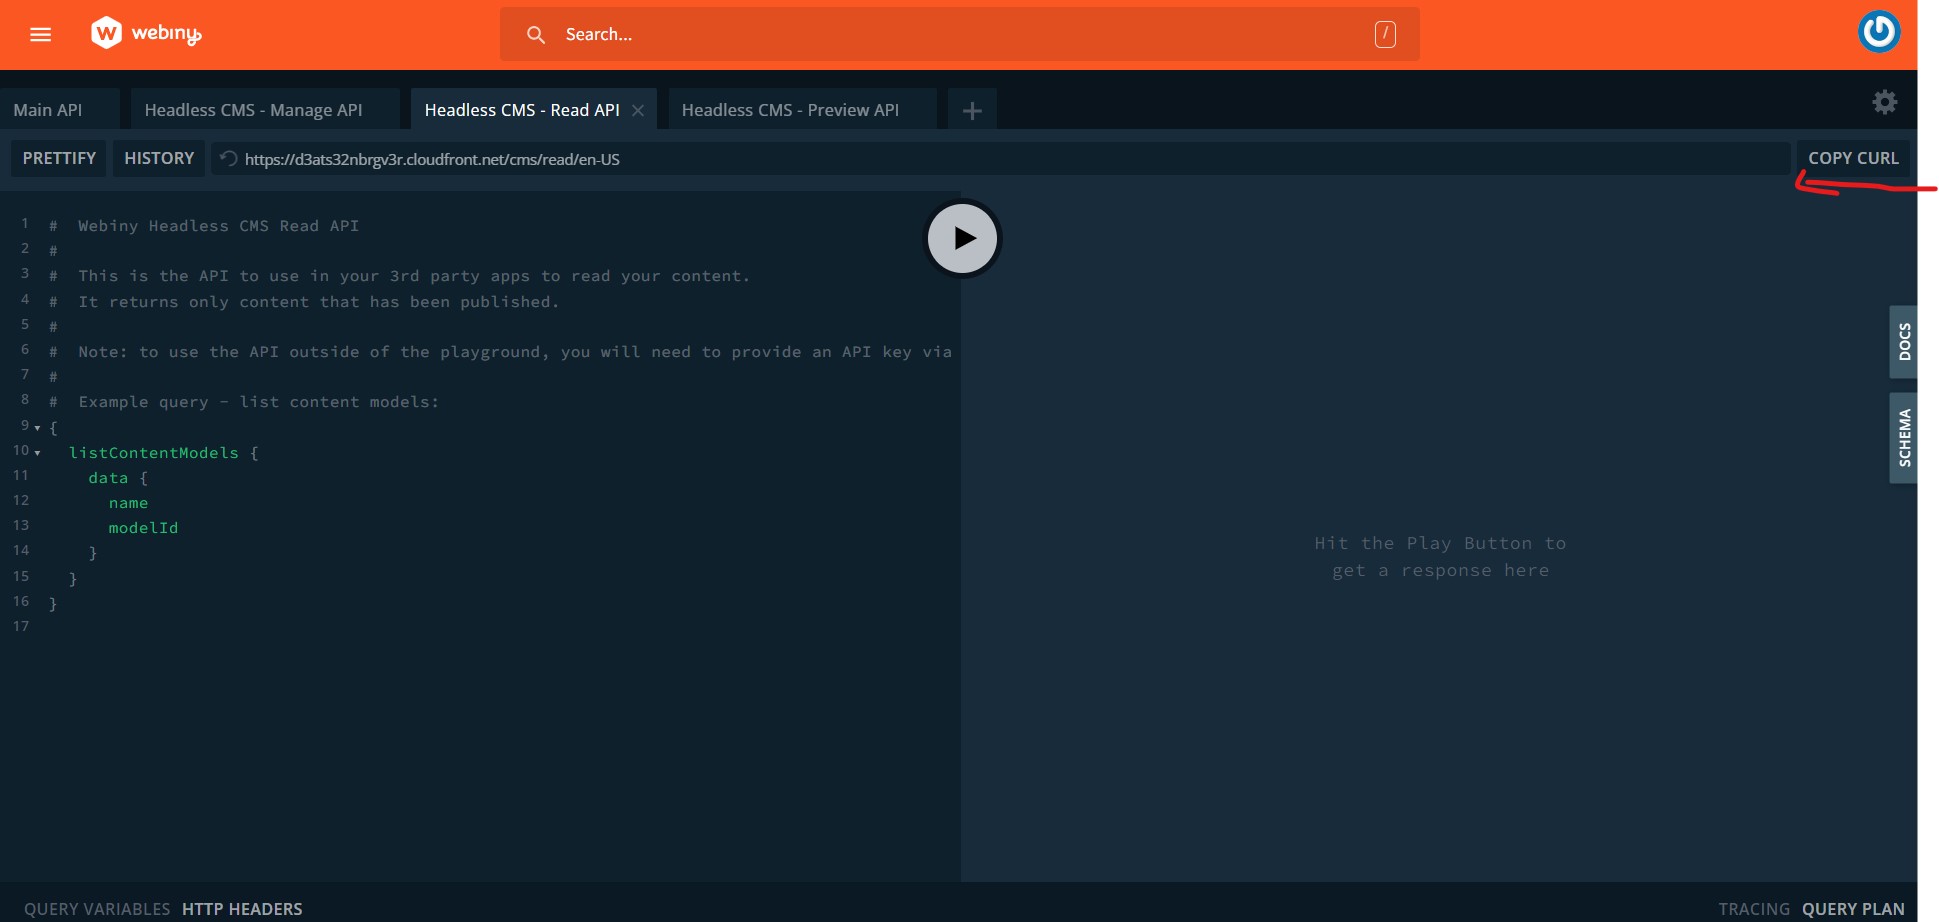
Now you can copy the **URL ** and save it in your Svelte app's .env file.
Create an .env file in the root of your Sveltekit project and add your data below:
VITE_PUBLIC_CMS_ENPOINT: YOUR WEBINY CMS URL HERE
VITE_PREVIEW_API_CMS_ENPOINT: YOUR WEBINY CMS PREVIEW ENPOINT
VITE_PUBLIC_TOKEN_SECRET:  YOUR WEBINY CMS TOKEN API HERE
Fetching data for pages using Webiny Headless CMS
We will be using graphql-request to Fetch the Webiny CMS to our Svelte application. Webiny provides a great API playground for testing your backend. Open a browser, go to Webin admin dashboard and open API Playground.
Go to Webiny Manage API and enter the value in the bottom left. Run your code and see the results.
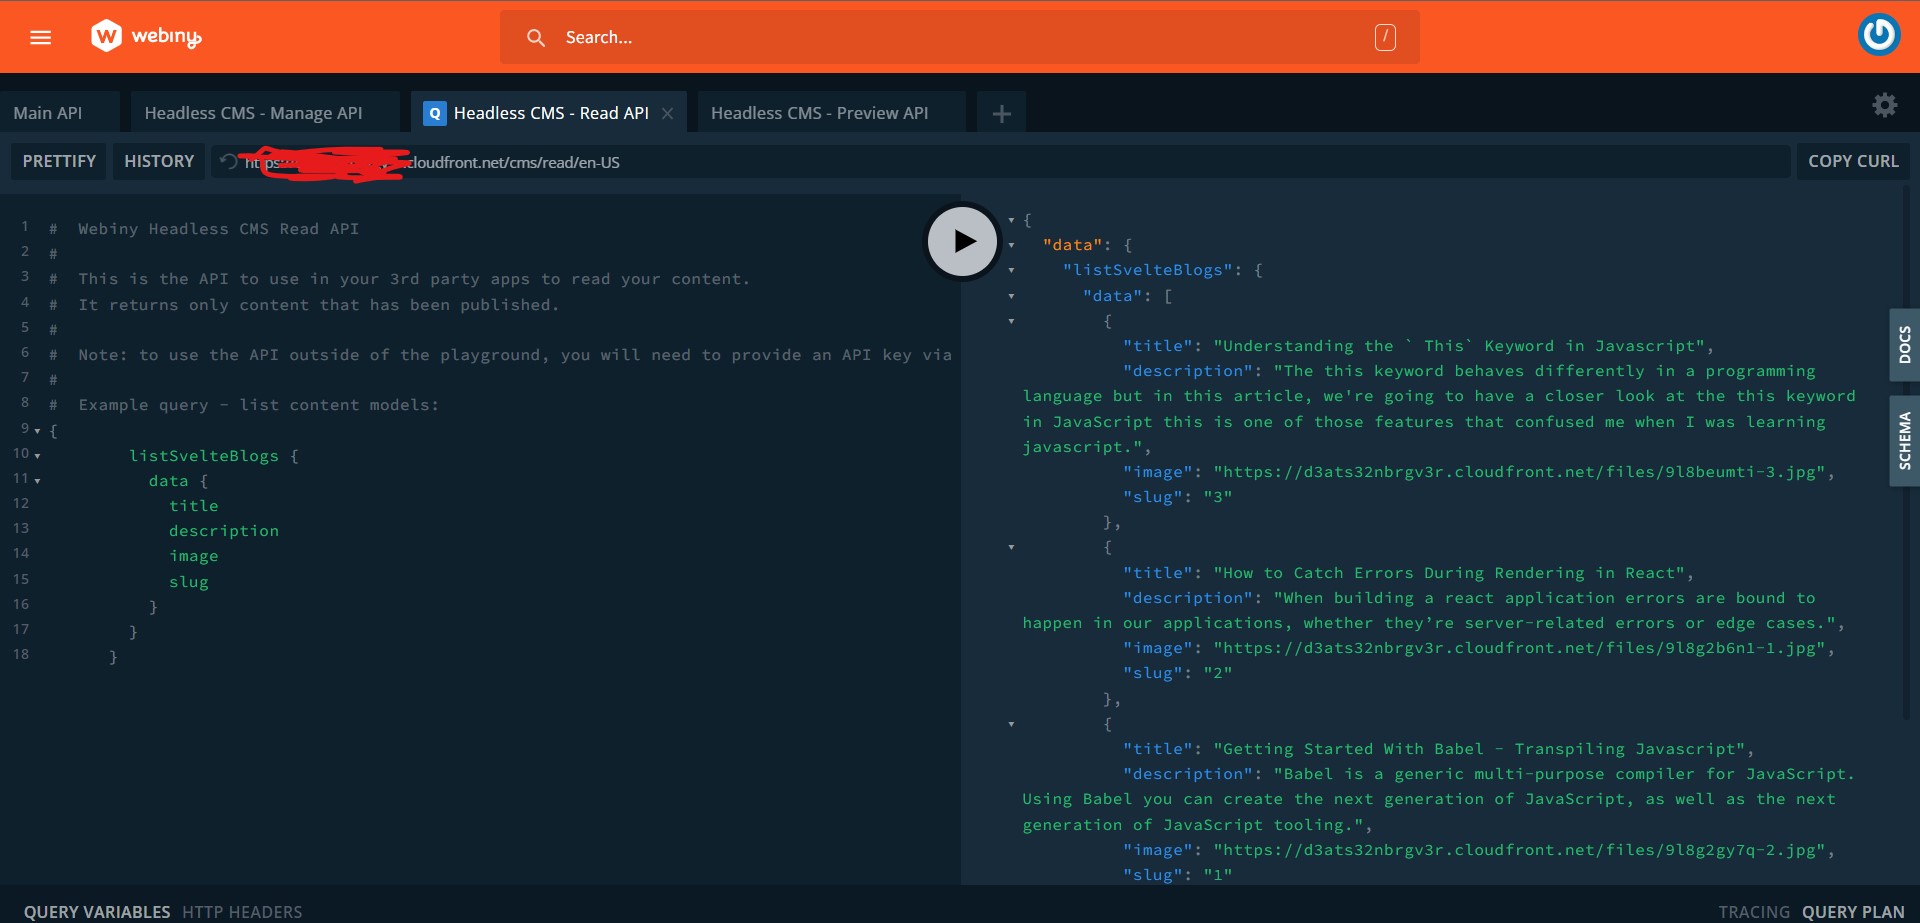
Here is the code for the above query:
        {
                listSvelteBlogs {
                    data {
                        title
                        description
                        image
                        slug
                    }
                }
            }
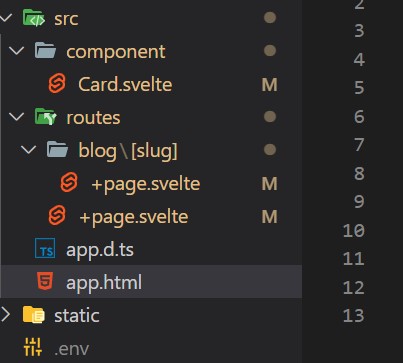
Now we already have a project structure. Describes the folders and files used in this project. Check out the directory structure below.
.
├── src/
│   └── component/
│       ├── Card.svelte
|    └── routes
│        └── +page.svelt
│       └── blog/
│           └── [slug]
                 └── +page.svelte
└── app.d.ts
└── app.html
Open your +page.svelte file inside routes folder and enter the code below :
//  routes/+page.svelte

<script lang="ts">
    import { onMount } from 'svelte';
    import Card from '../component/Card.svelte';
    import { GraphQLClient, gql } from 'graphql-request';

    let blog: any[];
    let loading = false;

    onMount(() => main(false));

    export async function main(wait: boolean) {
        loading = false;
        const endpoint = import.meta.env.VITE_PUBLIC_CMS_ENPOINT;

        const graphQLClient = new GraphQLClient(endpoint, {
            headers: {
                'Content-Type': 'application/json',
                Authorization: `Bearer ${import.meta.env.VITE_PUBLIC_TOKEN_SECRET}`
            }
        });

        const query = gql`
            {
                listSvelteBlogs {
                    data {
                        title
                        description
                        image
                        slug
                    }
                }
            }
        `;
        await graphQLClient.request(query).then((res) =>
            setTimeout(
                () => {
                    blog = res.listSvelteBlogs.data;
                    loading = true;
                },
                // Simulate a long load time.
                wait ? 1000 : 0
            )
        );
    }

    // Fetch Error
    main(false).catch((error) => console.error(error));
</script>

<svelte:head>
    <title>Home</title>
    <meta name="description" content="Svelte blog app" />
</svelte:head>

<section>
    <h1>
        <span class="welcome">Create a blog with Webiny and Svelte / SvelteKit </span>
    </h1>

    {#if !loading}}
        <div class="loading">
            <img src={'https://i.ibb.co/tPk7RvT/giphy.gif'} alt="a brand new sports car" />
        </div>
    {:else}
        <Card {blog} />
    {/if}
</section>
Page Styles
<style>
    section {
        display: flex;
        flex-direction: column;
        justify-content: center;
        align-items: center;
        flex: 1;
        background-color: rgba(36, 34, 34, 0.89);
        padding: 4.7rem 0px;
    }

    .welcome {
        text-align: center;
        font-size: 28px;
        text-transform: capitalize;
        color: #ffffff;
    }
    h1 {
        margin-bottom: 3rem;
    }
</style>
Creating pages from API data
Then create a component folder in the src folder and create a Card.svelte file to add a data card to display the posts we'll get from the APL. Enter the code below :
//  component/Card.svelte

<script lang="ts">
    export let blog: any[] = [];
</script>

<main class="container">
    {#each blog as blog}
        <div class="card-container">
            <a href={`/blog/${blog.slug}`}>
                <div class="card-image">
                    <img src={blog.image} alt="a brand new sports car" />
                </div>
                <div class="card-body">
                    <span class="card-badge card-badge-blue">{blog.slug}</span>
                    <h1>{blog.title}</h1>
                    <p class="card-subtitle">{blog.description.slice(0, 80)}</p>
                    <div class="card-link">Read more</div>
                </div>
            </a>
        </div>
    {/each}
</main>
In the snippet above, you'll see that we've received the blog props, by importing it from your route page +page.svelte file and mapping list the data.
Card Styles
<style>
    .container {
        display: grid;
        grid-template-columns: 1fr 1fr 1fr;
        gap: 20px;
    }

    .card-container {
        width: 350px;
        height: 480px;
        background-color: #fff;
        border-radius: 8px;
        margin: auto;
        box-shadow: 0 2px 20px rgba(0, 0, 0, 0.1);
        overflow: hidden;
    }
    .card-container a {
        text-decoration: none;
        color: #000000;
    }

    .card-image img {
        height: 220px;
        width: 100%;
        border-radius: 8px 8px 0 0;
        background-size: cover;
    }

    .card-body {
        display: flex;
        flex-direction: column;
        align-items: start;
        padding: 16px;
        min-height: 200px;
    }

    .card-badge {
        text-transform: uppercase;
        background-color: #fff;
        color: #fff;
        padding: 2px 8px;
        border-radius: 70px;
        margin: 0;
        font-size: 12px;
    }

    .card-badge-blue {
        background-color: #92d4e4;
    }

    .card-body h1 {
        font-size: 16px;
        margin: 8px 0;
    }

    .card-body p {
        font-size: 14px;
        margin: 8px 0 16px 0;
    }

    .card-link {
        font-size: 16px;
        margin: 8px 0 16px 0;
    }

    @media screen and (max-width: 1000px) {
        .container {
            grid-template-columns: 1fr;
        }
    }
</style>
Using the Preview API to fetch draft data
The blog slug page follows the same approach used to create the index page. Create a blog folder in the route folder and also create a +page.svelte file in the blog folder where the [slug] folder is. Enter the code below
//  routes/blog/[slug]/+page.svelte

<script lang="ts">
    import { onMount } from 'svelte';
    import { page } from '$app/stores';
    import { GraphQLClient, gql } from 'graphql-request';

    let slugID = $page.params.slug;
    let blog: any;
    let preview: any;
    let loading = false;

    onMount(() => main(false));
    export async function main(wait: boolean) {
        loading = false;
        const endpoint = import.meta.env.VITE_PREVIEW_API_CMS_ENPOINT;

        const graphQLClient = new GraphQLClient(endpoint, {
            headers: {
                'Content-Type': 'application/json',
                Authorization: `Bearer ${import.meta.env.VITE_PUBLIC_TOKEN_SECRET}`
            }
        });

        const query = gql`
            {
                listSvelteBlogs {
                    data {
                        title
                        description
                        image
                        slug
                    }
                }
            }
        `;
        await graphQLClient.request(query).then((res) =>
            setTimeout(
                () => {
                    blog = JSON.stringify(
                        res.listSvelteBlogs.data.find((p: { slug: string }) => p.slug === slugID)
                    );
                    preview = JSON.parse(blog);
                    loading = true;
                },
                // Simulate a long load time.
                wait ? 1000 : 0
            )
        );
    }

    // Fetch Error
    main(false).catch((error) => console.error(error));
</script>

<svelte:head>
    <title>Blog details</title>
    <meta name="description" content="Svelte blog app" />
</svelte:head>

<section>
    <a href="/"><button class="btn btn-primary">Go Back</button></a>

    {#if !loading}
        <div class="loading">
            <img src={'https://i.ibb.co/tPk7RvT/giphy.gif'} alt="a brand new sports car" />
        </div>
    {:else}
        <div class="card-wrapper">
            <div class="card">
                <div class="card-content">
                    <h3>{preview && preview.title}</h3>
                </div>
                <div class="card-header">
                    <img src={preview && preview.image} alt="" />
                </div>
                <div class="card-body">
                    <h3>{preview && preview.description}</h3>
                </div>
            </div>
        </div>
    {/if}
</section>
Page Styles
<style>
    .btn {
        appearance: none;
        -webkit-appearance: none;
        font-family: sans-serif;
        cursor: pointer;
        padding: 12px;
        min-width: 100px;
        border: 0px;
        -webkit-transition: background-color 100ms linear;
        -ms-transition: background-color 100ms linear;
        transition: background-color 100ms linear;
    }
    .btn-primary {
        background: #3498db;
        color: #ffffff;
    }

    .btn-primary:hover {
        background: #2980b9;
        color: #ffffff;
    }
    .btn:focus {
        outline: 0;
    }

    .card-wrapper {
        display: flex;
        justify-content: center;
        align-items: center;
    }
    .card {
        width: 860px;
        background-color: #fff;
        border-radius: 0.5rem;
    }

    .card-header {
        width: 100%;
    }

    .card-header img {
        width: 100%;
        border-top-left-radius: 0.5rem;
        border-top-right-radius: 0.5rem;
    }

    .card-content {
        padding: 1rem;
    }

    .card-content h3 {
        margin: 1rem 0 0.5rem 0;
        font-size: 35px;
        text-align: center;
        text-transform: capitalize;
        text-decoration: underline;
    }

    .loading img {
        display: block;
        margin-left: auto;
        margin-right: auto;
        width: 20%;
    }
</style>
Now if we start our dev server, we should be able to see the blog site.

Conclusion
We learned how to use the Webiny headless CMS, set up a content model, create tokens, manage permissions, and test GraphQL using the Webiny API Playground.
We also learned how to use Graphql-Request with Svelte/Sveltekit to connect a Webiny CMS to your blogging application.
Resources
For better understanding, check the following:
Svelte official website : Link here ✌️
SvelteKit official website : Link here ✌️
Webiny official website : Link here ✌️
GraphQL official website : Link here ✌️
Thank you for reading!


