A Comprehensive Guide To Authentication Workflow With React-Router V6

As a Senior Frontend Engineer with years of professional experience building web applications, with a focus on frontend development. I enjoy critically analyzing software requirements and effectively prioritize them. I'm a good observer of software engineering best practices and work well in a team. I have a strong interest in clean, testable, and maintainable code.
In this tutorial, we will explore the steps to integrate react-router v6 into an authentication workflow. The React Router is a powerful routing library for React and is also popular in the React ecosystem, which means it's the most used routing library for React JS. An example of another routing library that we have is called Reach Router.
Reach Router is a small, simple router for React that borrows from React Router, Ember, and Preact Router. Reach Router has a small footprint, supports only simple route patterns by design, and has strong (but experimental) accessibility features. Source: Reach Router's official website
- Note: We will be covering a few advanced concepts of React. So having intermediate knowledge of React is advisable.
In this article, we're going to look into React Router v6 and how it works by integrating the authentication workflow with React Router v6.
While building a simple web application that covers:
How to Configure a Routes
How to Use Nested Routes and Outlets for Layout
Creating a login, 404, and dashboard page
How to Create private and public routes
Note: in this article, we're not consuming APIs or Posting data to a DB
Getting started
The initial step is to create a new React app boilerplate, and we will accomplish this by utilizing the create-react-app template.
You can now open your terminal.
- First, install the React boilerplate by typing:
npx create-react-app test-app
- Second 'CD' to the current folder by typing:
cd test-app
- Third install the react-router by typing:
npm install react-router-dom@6
- Fourth, start the app by typing:
npm run start
Welcome aboard! 🚀 Before we dive into coding, let's first select your code editor. In this article, I'll be demonstrating the usage of Visual Studio Code as my preferred code editor. Download the code editor here.
VScode project view
Let's create an outline of our project's file structure.
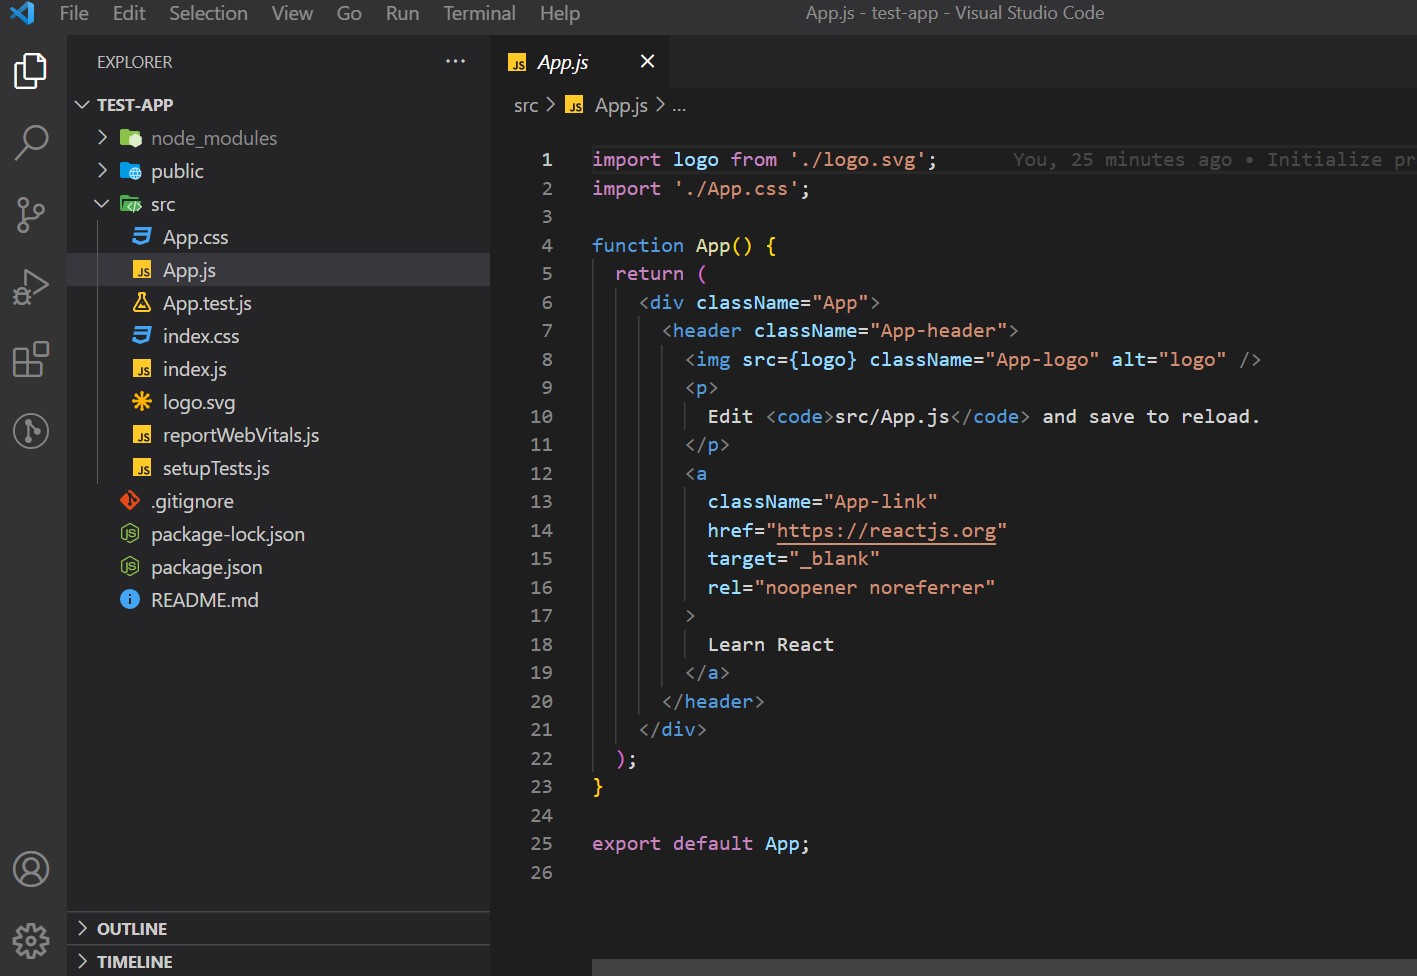
To begin, navigate to the "src" folder. In this article, we won't need several files from this folder. Please go ahead and delete those files.
logo.svg
App.test.js
App.css
setupTests.js
reportWebVitals.js
To achieve the desired project folder and file structure, follow these steps:
--public
-- src
       |
       components
           - 404.js
           - home.js
           - login.js
        |
       Routing
           - PrivateRouting.js
           - PublicRouting.js
  --App.js
  --index.css
  --index.js
  -- .gitignore
  --package-lock.json
  --package.json
  --README.md
Check out the live demo:
You can explore the provided CodeSandbox link to access the entire code and view the file structure.
CSS styles
To access the CSS styles used in this article, you can refer to the live demo link above. The CodeSandbox project includes the necessary CSS styles, which you can find in the "index.css" file. Feel free to copy and paste this code into your own "index.css" file for your project.
How to Configure a Routes
Now that all the required folders and files have been created, let's move on to building our project. Open the "index.js" file located inside the "src" folder. We will be setting up and configuring the Routes system there. You can copy and paste the following code into the "index.js" file:
import React from 'react';
import ReactDOM from 'react-dom/client';
import { BrowserRouter } from "react-router-dom";
import App from './App';
import "./index.css";

const root = ReactDOM.createRoot(document.getElementById('root'));
root.render(
  <React.StrictMode>
    <BrowserRouter>
      <App />
    </BrowserRouter>
  </React.StrictMode>
);
Within the "index.js" file, you'll notice the BrowserRouter component being imported from "react-router-dom" and wrapped around the App component as shown below:
    <BrowserRouter>
      <App />
    </BrowserRouter>
The <BrowserRouter> is the recommended interface for running React Router in a web browser. A <BrowserRouter> stores the current location in the browser's address bar using clean URLs and navigates using the browser's built-in history stack. Source: official react-router website
Creating the login, 404, and dashboard page
Now that we've configured our routes, let's proceed to the next step. For this section, I won't be demonstrating how to design or style an input form, for instance. However, I'll guide you through the code step by step, and we will address it incrementally.
Please take note: The CSS styles used in this article can be referenced in the live demo link above. The CodeSandbox project contains these CSS styles, which you can find in the "index.css" file. You can copy and paste this code into your own "index.css" file to apply the necessary styles for your project.
- The login page: navigate to the "src" folder. Inside the "component" folder that we created earlier, locate and open the "login.js" file. You can then copy and paste the provided code into the "login.js" file as follows:
import React from "react";

export default function LoginComponentPage() {
  const handleSubmit = async () => {
    sessionStorage.setItem(
      "UserToken",
      JSON.stringify("eyJhbGciOiJIUzI1NiIsInR5cCI6IkpXVCJ9")
    );
  };

  return (
    <React.Fragment>
      <div className="container">
        <form id="form">
          <h1 className="copyright">Login</h1>
          <fieldset>
            <label htmlFor="email">Email address:</label>
            <input
              type="email"
              name="email"
              id="email"
              defaultValue="davidigheose@gmail.com"
            />
          </fieldset>
          <fieldset>
            <label htmlFor="password">Password:</label>
            <input
              type="password"
              name="password"
              id="password"
              defaultValue="Testing Testing"
            />
          </fieldset>
          <fieldset>
            <button name="submit" type="submit" onClick={handleSubmit}>
              submit
            </button>
          </fieldset>
        </form>
      </div>
    </React.Fragment>
  );
}
In the provided code, we've created a form that allows users to input their email and password. For this project, we won't be making API requests yet, but we'll work on that as we progress.
Inside the "login.js" file, there's a functional component named, LoginComponentPage which renders the login form. Inside this function, you'll find a handleSubmit function for handling form submissions.
  const handleSubmit = async () => {
    sessionStorage.setItem(
      "UserToken",
      JSON.stringify("eyJhbGciOiJIUzI1NiIsInR5cCI6IkpXVCJ9")
    );
  };
The handleSubmit function you mentioned will typically send the input form data to an endpoint to validate it against a database and receive a response containing a JWT token. However, in this case, it appears that a fake JWT token is generated and stored in the sessionStorage when the form is submitted. This fake token is then used to access the Public and Private Routes.
In a real-world scenario, this process would involve authenticating users and providing them with a valid JWT token upon successful login. The token would then be used for authorization and accessing protected routes.
- The dashboard page: In the "src" folder, find the "component" folder that we created earlier. Inside the "component" folder, locate the "home.js" file and copy and paste the provided code into the "home.js" file as instructed.
import React from "react";
import { Link, useNavigate } from "react-router-dom";

export default function DashboardPage() {
  const navigate = useNavigate();

  const onLogout = () => {
    sessionStorage.removeItem("UserToken");
    window.location.reload(false);

    setTimeout(() => {
      navigate("login");
    }, 3000);
  };

  return (
    <React.Fragment>
      <div className="topnav">
        <Link to="/" className="active">
          Testing
        </Link>
        <Link to="#">Home</Link>
        <Link to="#" className="active">
          about
        </Link>
        <div>
          <div className="split" onClick={onLogout}>
            LogOut
          </div>
        </div>
      </div>

      <div className="header">
        <h1>Headline</h1>
        <p>1 sentence description</p>
      </div>
    </React.Fragment>
  );
}
In the provided code, we've created a simple home dashboard page that includes a logout button. Within the DashboardPage function component, there's a onLogout function. When the "Logout" button is clicked, the onLogout function is invoked. This function removes the JWT token from the sessionStorage and then redirects the user to the login page, which is a public route.
This mechanism allows users to log out of the application, clearing their authentication token, and returning them to the login page.
- The 404 page: In the "src" folder, locate the "component" folder that was created earlier. Within the "component" folder, open the "404.js" file, and you can copy and paste the provided code inside it as per your instructions.
import React from "react";
import { Link } from "react-router-dom";

export default function OopsComponentPage() {
  return (
    <React.Fragment>
      <div className="mainbox">
        <div className="err">404 </div>
        <div className="msg">
          The page you are looking for does not exist or an error occurred, go
          back to home page and retry
          <p>
            Let's go <Link to="/">home</Link> and try from there.
          </p>
        </div>
      </div>
    </React.Fragment>
  );
}
In the provided code, there's a functional component named OopsComponentPage. This component is designed to be rendered when a user attempts to navigate to a page that doesn't exist, displaying a "404 Page Not Found" message or similar content. It's a standard practice to have such a component to handle routes that are not defined in your application. How to create private and public routes
Now that we created the login, 404, and dashboard pages. let's set up the private and public files.
- Private routes: To implement the PrivateRoute functionality, navigate to the "Routing" folder within the "src" directory, open the "PrivateRoute.js" file, and proceed to copy and paste the provided code into that file, as instructed.
import React from "react";
import { Navigate, Outlet } from "react-router-dom";

const PrivateRoute = (props) => {
  let loggedIn = false;

  // Jwt token
  const jwtToken = sessionStorage.getItem("UserToken");
  let token = JSON.parse(jwtToken);

  if (token) {
    loggedIn = true;
  }

  return !loggedIn ? <Navigate to="/login" /> : <Outlet />;
};

export default PrivateRoute;
In the provided code, the PrivateRoute function is responsible for checking if a JWT token is available in the sessionStorage. If the token is present, it sets the loggedIn variable to true. If the token is not present, the loggedIn variable remains false.
The function then returns an "if statement." If the loggedIn variable is true, it renders the child route element, <Outlet />, allowing access to the private route content. If the loggedIn variable is false, it redirects the user to the public route by returning <Navigate to="/login" />, sending them to the login page.
This mechanism enforces authentication to access private routes and redirects unauthenticated users to the login page.
- Public routes: in the src folder you we see a folder called Routing which we created in the beginning before now inside the Routing folder open your PublicRoute.js file and copy and paste this code inside it:
import React from "react";
import { Navigate, Outlet } from "react-router-dom";

const useAuth = () => {
  const jwtToken = sessionStorage.getItem("UserToken");
  let token = JSON.parse(jwtToken);

  if (token) {
    return true;
  } else {
    return false;
  }
};

const PublicRoutes = () => {
  const auth = useAuth();

  return auth ? <Navigate to="/dashboard" /> : <Outlet />;
};

export default PublicRoutes;
In the provided code, two functions are introduced: useAuth and PublicRoute.
useAuthfunction: This function checks whether the JWT token is available in thesessionStorage. It returns a boolean value using an "if statement." If the token exists, it returnstrue, indicating that the user is authenticated. If the token doesn't exist, it returnsfalse, indicating that the user is not authenticated.PublicRoutefunction: This function takes theuseAuthfunction as a hook, assigning it to theauthvariable. This is used to determine whether the user is authenticated or not. Based on the value ofauth, thePublicRoutefunction manages access to public routes. If the user is authenticated (authistrue), it allows access to the public route content. If the user is not authenticated (authis `false), the user is allowed to access public routes.
These functions work together to control access to public routes based on the user's authentication status.
const auth = useAuth();
In the code, the auth variable receives a boolean value that determines whether the user is authenticated or not. If auth is true, it returns <Navigate to="/dashboard" />, which directs the user to the "home dashboard" path, allowing access to private content. If auth is false, it returns the child route element, <Outlet />, leading the user to the public route path (the login page), making it accessible for unauthenticated users.
This logic ensures that authenticated users are directed to private content, while unauthenticated users are redirected to the public route (login page) in your application.
How to Use Nested Routes and Outlets for Layout
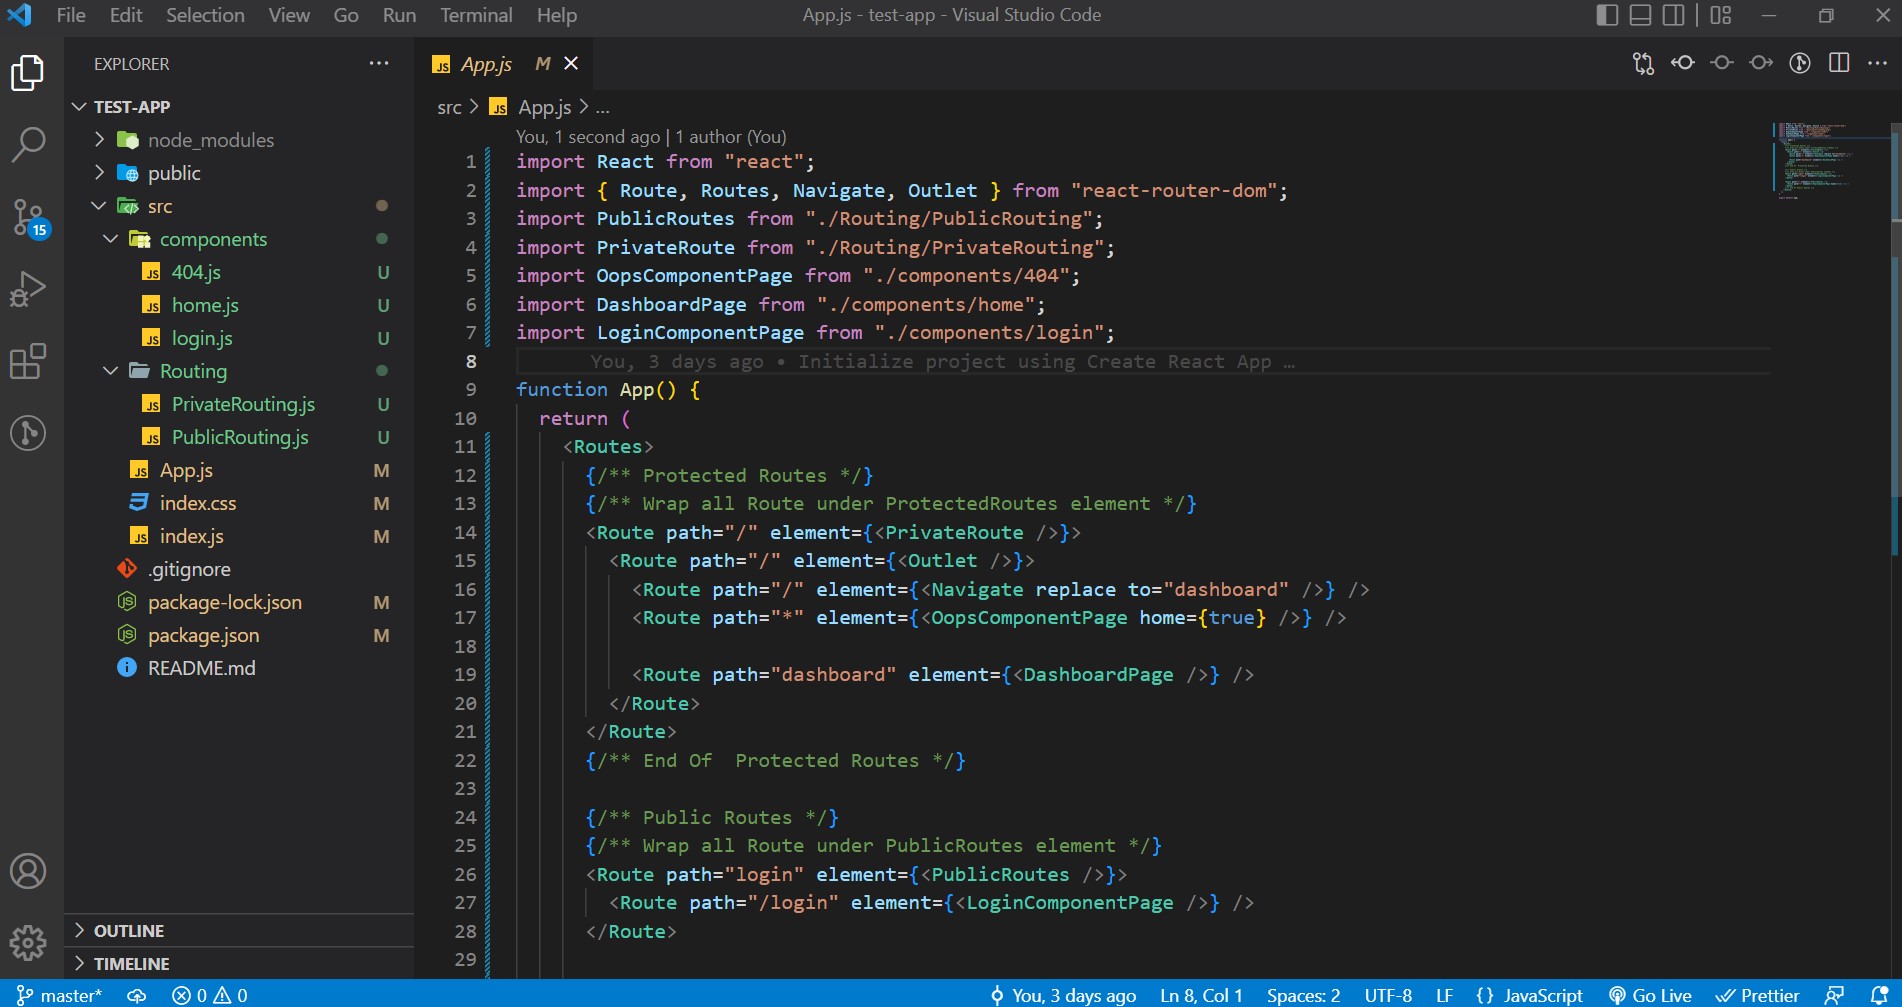
To set up the route layout, open the "App.js" file located within the "src" folder. You can copy and paste the provided code into this file, following the instructions you've provided.
import React from "react";
import { Route, Routes, Navigate, Outlet } from "react-router-dom";
import PublicRoutes from "./Routing/PublicRouting";
import PrivateRoute from "./Routing/PrivateRouting";
import OopsComponentPage from "./components/404";
import DashboardPage from "./components/home";
import LoginComponentPage from "./components/login";

function App() {
  return (
    <Routes>
      {/** Protected Routes */}
      {/** Wrap all Route under ProtectedRoutes element */}
      <Route path="/" element={<PrivateRoute />}>
        <Route path="/" element={<Outlet />}>
          <Route path="/" element={<Navigate replace to="dashboard" />} />
          <Route path="*" element={<OopsComponentPage home={true} />} />

          <Route path="dashboard" element={<DashboardPage />} />
        </Route>
      </Route>
      {/** End Of  Protected Routes */}

      {/** Public Routes */}
      {/** Wrap all Route under PublicRoutes element */}
      <Route path="login" element={<PublicRoutes />}>
        <Route path="/login" element={<LoginComponentPage />} />
      </Route>

      <Route path="*" element={<PublicRoutes />}>
        <Route path="*" element={<OopsComponentPage home={true} />} />
      </Route>
      {/** End Of Public Routes */}
    </Routes>
  );
}

export default App;
in this App.js file, you see that we import some items from "react-router-dom" which are :
Routes: The
Routescan be explained as a wrapper used to look through all itschildRouteRoute: The
Routecan be explained as a wrapper that takes two props which arepathandelement, the props path checks its current URL if it matches, it renders the props element which is the component.Navigate: The
Navigateis used inside theelementto change a current location.Outlet: The
Outletis used inside theelementto render the child route elements also it helps the Nested UI to render.
Now we know what the routes, route, navigate and outlet mean and do, am going to work through the Private and Public Route.
Let's go through the code in our App.js step by step from the private route to the public route :
- For the private route, we have this code :
   {/** Protected Routes */}
      {/** Wrap all Route under ProtectedRoutes element */}
      <Route path="/" element={<PrivateRoute />}>
        <Route path="/" element={<Outlet />}>
          <Route path="/" element={<Navigate replace to="dashboard" />} />
          <Route path="*" element={<OopsComponentPage home={true} />} />

          <Route path="dashboard" element={<DashboardPage />} />
        </Route>
      </Route>
  {/** End Of  Protected Routes */}
We used the Route as the parent wrapper which takes the path and element props, the element props take the <PrivateRoute /> component if it is true the route renders the path="/" which is the home dashboard page.
Remember that
<Outlet />allows nested UI to show up when child routes are rendered.
- "Not Found" Routes: When the route does not match the URL, we render a "404 page" aka not found using
path="*"as seen above.
- For the public route, the difference between the public and private is just a little different in the public route we are using
<PublicRoutes />an element to wrap the parent route, if it is true the route renders the path set. code below
  {/** Public Routes */}
      {/** Wrap all Route under PublicRoutes element */}
      <Route path="login" element={<PublicRoutes />}>
        <Route path="/login" element={<LoginComponentPage />} />
      </Route>

      <Route path="*" element={<PublicRoutes />}>
        <Route path="*" element={<OopsComponentPage home={true} />} />
      </Route>
 {/** End Of Public Routes */}
Fire this up in your browser and you should be able to see how it works, you can check out the live demo app and code.
The End - What Next?
Now that you've grasped the workings of React-Router V6 through the integration of an authentication workflow, understood its purpose, and learned how to implement it in your React application, the most convincing way to solidify your knowledge is through practical, hands-on experience. ✌️
Thanks for reading
Feel free to subscribe to my email newsletter and Connect with me


